


RoadScribe’s iRV: Survival On Wheels
January 20th of 2009 was the start of the perfect
intentional ten year
financial storm. Are you ready?
January 20th of 2009 was the start of the perfect
intentional ten year
financial storm. Are you ready?
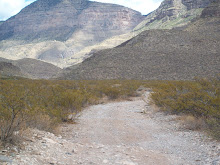
How iRV became winter worthy or, our next installment in taking what you have out of sheer determination and making it work. And since iRV is a 25ft. fifth wheel, that will be our model.
When I was still base camping at Lake Point RV Resort in Canyon Lake, Texas and going through the fiasco of selling my over mortgaged home, the idea of heading back to the Four Corners states was on my mind, along with the winters. So I spent that last humid winter researching what mods that could be done on my own to make this rig last. Internet search word games along this line yielded full time RV’ers far north as Canada declaring, “The banker will have his hand out for the payment, so why not live in it year round.” In response to my question, I received links with photos of articles published on the internet, with some of the more enterprising selling their plans on CD’s. So in that spirit, I’ll share my own technique of extra winter insulation. Some of which I have not used, and some I do, thanks to those that dare camp where the snow piles up in frigid temperatures.
First step of my project came after back to back hail storms from hurricane ruminants in June of ‘08 that left my three crank up vent caps full of holes, luckily around the edges. The caps that came on iRV were a flimsy plastic material. I got up on the roof and thought this I could do myself, and after posting on RVNet was told the process and given a link to PPLmotorhomes.com in Houston, TX and a large reseller of used RV’s and parts, shipping them out to me in a week. Looking up crank vent hoods, you get a detailed description of how to order by checking the vent cap hinge. I ordered the Ventline guaranteed unbreakable caps, and was told when I had the inside vent collar off, tuck some more the pink fiberglass insulation, being careful of electrical wires. I got my pink insulation scraps from a contractor neighbor. And while you are at it remove as many of the ceiling fixtures as you can and add pink insulation there too. Thanks guys on the RVNet for this additional idea.
Maxxair Vent cover caps are on this summer’s renovation list. Purchased from PPL, they give the instructions on the Web.
Next is a trip to the local Mercantile or Home Depot for some of that nifty canned spray insulation, quilted aluminum insulation, weather stripping. I did on this trip get pipe insulation, heat tape and a storage box for my water filters but if your rig has tanks and a water pump, just use that. At least here, the water is pretty hard and while the plumbing didn’t freeze the calcium in the water stopped up my pressure regulator, luckily found evening before a snow storm was due in. Since I am working from my RV, I have a dump-flush-fill day. So if you see me reading or writing in a camp chair in back of iRV, come on over with a coffee mug, I'll crank up the camp pot and we'll chat a spell. Today is Tank Day.
These three processes have worked so far even with days in the twenty’s and single digit nights.
First check the belly of your rig. I got a big cardboard box to lay on and after checking for snakes under the trailer, crawled under there in an old T and jeans. There were seams with gaps going across the belly (another thing to list for with my dream rig: one piece no seam.) Stuffing the gaps and holes with strips of an old sheet, leave enough room to spray in the insulation over it. No wonder I was cold in Texas. Not cold now though. Then open access doors and check for other places to spray with the insulation going into the coach itself around pipes and covered wires. Doing this prevents rodents from getting inside. No critters traipsing about in the night yet.
Next you need a flat surface to cut the aluminum insulation, tape measure and hot glue gun. (Thanks Sylvia Wrenn for the glue gun idea.) Measure all your windows and custom cut pieces for each window. I also have two bay windows with those lower flap windows and cut two big pieces for each. That way on a sunny day you can stay cool by covering the top bay window and not cover up the flap windows until sun down. The Day-Night shades fit right over the insulation. You can fold the insulation up in the morning and use passive solar to heat you rig and save on the propane. Also cut a square for each crank vent and stuff in an insulating pillow in each to remove and vent on days when wind is calm since you can get condensation inside the caps, or for using the shower. Outside go on a search inside the propane and unheated compartments. I found bare floor area to cover with patches of hot glued insulation onto. Any place you see daylight, make a temporary wall or floor with the insulation. Makes a world of difference. When you break camp, take your unglued patches out and stack them in some kind of order you will remember for the next camp set-up.
Canadians and more deep winter state RV’ers told me they also use this insulation on interior walls of closets, cabinets, walls behind plumbing under cabinets and behind the toilet, and in the bay area. Some have come up with creative skirting to put around the rig if it is stationary for long periods of time. As of yet, with my furnace working well, I haven’t had to do this part of the procedure.
Next check insulation around windows and entry doors. If frayed, replace it by scraping off the old and pressing on the new. I also got a dowel and hot glued a throw blanket to tuck that in above the doorway. With .25 of batting from the public library resell shop, made a draft snake by rolling that up in a sheet.
Winterizing is an ongoing project with the latest idea of parking the truck on the north side to play wind gust buffer and redesigning the inside to be livable with the slide out in. Seems strange at first, but consider less space to heat, adding to a more wind resistant structure. If you just stand back and think, you can make these RV’s work for you until the economic situation improves and it is once again safe to dream of a place of your own.
You have been RoadScribed.
Disconnect from the TV Matrix and your creativity will emerge.


4 comments:
RS, you never cease to amaze me! Great blog!
Ernie
Hey RS...another awesome post! sheesh lady!
Anyway - you asked last night about cheese making recipes using powdered milk - hope this helps (scroll down the page to cheddar cheese):
http://schmidling.com/cres.htm
As well....here is an awesome blogger that I really enjoy:
http://simple-green-frugal-co-op.blogspot.com/
her recipe is the simplest ricotta cheese recipe I have ever seen...its just milk and acid. So I am sure that you could use powdered milk and add water to start.
Let me know if you make either and how it goes...and looking forward to hooking up with you some more on ning! Take care buddy!
Glad I finially had the time to check out your blog-Good job! I nursed for alot of years and completely salute you! Your info is right on! I was one of those few who was hyper aware and vigilant and LOVED my patients! I finially got fed up with the system and moved over to natural health arena. I do Reiki, CranioSacral and Matrix energetis in my own shop now and am working my masters in herbology. Keep up the good work.
Thanks guys. Done with research for my next entry thanks to a suggestion from Alex. Got the links and look forward to making that cheese.
Post a Comment